Posted on

Configuring WebLogic to bypass username/password prompt

When starting a Weblogic Managed Server from the shell, you will be requested to enter username/password. You can however bypass it by using the boot.properties file. This text file should contain the username/password to start/stop an instance of WebLogic Server. Here are the steps to execute this recipe:

1.       Create boot.properties in $DOMAIN_HOME/servers/[server_name]/security with content like:

username=[superuser with admin role like weblogic]

password=[password of user]

2.       Repeat this step for the Weblogic Admin Server and all Managed Server.

Posted on

Oracle Weblogic JVM Settings

oracle weblogic book oracle weblogic books

Oracle WLS JVM settings

Setting the proper JVM Heap size is essential for applications requiring large memory areas. Generally speaking, the JVM settings of the Weblogic Administration server is not a vital task as applications should not be allowed to run on the administrative unit; however, this is an acceptable option if you are using it in the development stage. On the other hand, Weblogic Managed Servers should be tuned with the right amount of memory so that your applications won’t raise “Out of memory” errors but, at the same time, no excessive amount of memory is loaded.

Administration server JVM settings

JVM size of Admin server can be increased by changing –Xmx and -Xms values in setDomainEnv.sh (setDomainEnv.cmd for Windows) that is located in MW_HOME/user_projects/domains/<Domain>/bin

Within the setDomainEnv script, before “SET JAVA_OPTIONS=….”, you can specify the memory settings in the USER_MEM_ARGS variable. The format varies depending on your operating system and the kind of JVM that you are running. The following table summarizes the lines of code you should add, by providing a sample JVM configuration:

OS

JVM

Settings

 Windows 

 Sun /  HP

 set USER_MEM_ARGS=-Xms1280m -Xmx1280m -XX:PermSize=128m -XX:MaxPermSize=256m

 Windows

 JRockit

 set USER_MEM_ARGS=-Xms1280m -Xmx1280m -XnoOpt

 Unix

 Sun / HP

 USER_MEM_ARGS=-Xms1280m -Xmx1280m -XX:PermSize=128m -XX:MaxPermSize=256m


 export USER_MEM_ARGS

 Unix

 JRockit

 USER_MEM_ARGS=-Xms1280m -Xmx1280 –XnoOpt


 export USER_MEM_ARGS

Weblogic Managed server JVM settings

JVM size of Managed Servers can be configured from the Weblogic console. This can be achieved by navigating into the Environment > Servers tab. From there, select your server and click on the upper Server Start tab. The following screen will be displayed:

oracle weblogic book oracle weblogic books

Within this screen, enter the JVM arguments in the text area named “Arguments”. The new arguments will be triggered on the next server restart.

Posted on

Starting a Managed Server from the command line

The other approach which can be used to start up your Weblogic Managed Servers is the good old shell. This approach does not require using the Node Manager. Just move to the DOMAIN_HOME/bin folder and issue the startManagedWeblogic command passing as argument the NodeName and (optionally) the Server’s Admin Address and port. The server will then prompt to enter username and password. Here’s an example on a Windows box:

cd C:\wls1211_dev\user_projects\domains\base_domain\bin  C:\wls1211_dev\user_projects\domains\base_domain\bin>startManagedWebLogic.cmd WLSNode1 http://localhost:7001 Enter username - password

Server not starting?

A common cause of errors can be raised if the Managed Server could not find the Native Library to read the password securely from command line in the PATH or if -Dweblogic.management.allowPasswordEcho=false is set. If so, you should find a message like this on the server’s console:

“Server is Running in Development Mode and Native Library(terminalio) to read the password securely from commandline is not found.”

Solution:

In order to solve it, verify that terminalio library exists in the path. You can set this by specifying -Djava.library.path to the directory where this library exists or you can use -Dweblogic.management.allowPasswordEcho=true into the JAVA_OPTIONS of your startManagedWeblogic.cmd to enter the password in echo mode.

Finally, another possible solution is mentioned at the end of this chapter, in the recipe “How to configure WebLogic Server to bypass username/password prompt?

Posted on

Starting a Managed Server from the NodeManager

oracle weblogic book oracle weblogic books

In order to start a Weblogic Server using the Node Manager perform the following tasks:

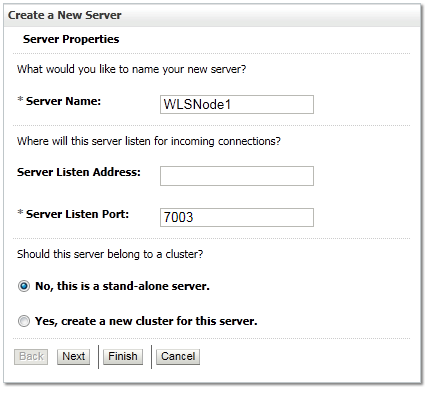
1.       Make sure that the server is associated with a Machine. This can be checked through the Configuration | General option of the Server window.

2.       Make sure that also the Node Manager is started on the Machine that hosts the server.

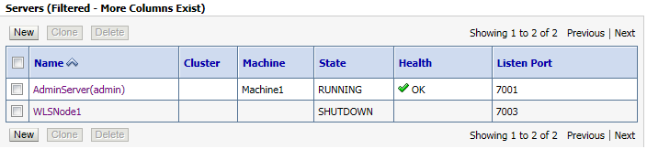
3.       Move to the Server | Control window. In the lower table, you can check the servers you want to start and simply click on the Start button.

oracle weblogic book oracle weblogic books

Troubleshooting Node Manager

A common source of issues is related to the certificate hostname verification. As a matter of fact, when trying to connect to the NodeManager a check verification is performed based on the certificate which is configured as IdentityKeystore.

Certificates are located into the MW_HOME\Weblogic\wlserver\server\lib\ folder and the default (demo) certificate is named DemoIdentity.jks.

It can happen that the certificate has been bound to an hostname which has changed (think about a change in your network configuration). This generally produces a message like this on the console:

Certificate chain received from localhost – 127.0.0.1 failed host name verification check. Certificate contained rhp360-c4-13 but check expected localhost

Then, the first check to be done is that the Machine Listen address corresponds to the hostname of the certificate. If you still cannot solve the issue, don’t panic! you can still re-generate your certificate in a minute by executing the CertGen utility and the corresponding ImportPrivateKey as follows:

C:\wls1211_dev\wlserver\server\bin>setWLSEnv.cmd  java utils.CertGen -cn localhost -keyfilepass DemoIdentityPassPhrase -certfile testcert -keyfile testkey

Generating a certificate with common name rnhp360-c4-13 and key strength 1024 issued by CA with certificate from C:\WLS121~1\wlserver\server\lib\CertGenCA.der  file and key from C:\WLS121~1\wlserver\server\lib\CertGenCAKey.der file

java utils.ImportPrivateKey DemoIdentity.jks DemoIdentityKeyStorePassPhrase demoidentity DemoIdentityPassPhrase testcert.pem testkey.pem

<30-dic-2012 19.21.29 CET> <Info> <Security> <BEA-090905> <Disabling CryptoJ JCE Provider self-integrity check for better startup performance. To enable this check, specify -Dweblogic.security.allowCryptoJDefaultJCEVerification=true>

<30-dic-2012 19.21.30 CET> <Info> <Security> <BEA-090906> <Changing the default Random Number Generator in RSA CryptoJ from ECDRBG to FIPS186PRNG. To disable this change, specify -Dweblogic.security.allowCryptoJDefaultPRNG=true>

<30-dic-2012 19.21.30 CET> <Info> <Security> <BEA-090908> <Using default WebLogic SSL Hostname Verifier implementation.>

Imported private key testkey.pem and certificate testcert.pem into a new keystore DemoIdentity.jks of type jks under alias demoidentity

Now copy this certificate into MW_HOME\wlserver\server\lib (before backing up a copy of the default DemoIdentity.jks certificate).

C:\wls1211_dev\wlserver\server\bin>copy DemoIdentity.jks C:\wls1211_dev\wlserver\server\lib  Overwrite C:\wls1211_dev\wlserver\server\lib\DemoIdentity.jks? (Yes/No/All): Yes          1 file(s) copied.

Posted on

How to start Weblogic Node Manager

The Node Manager is a WebLogic Server utility that enables you to start, shut down and restart the Administration Server and the Managed Server instances from a remote location. Although Node Manager is optional, it is highly recommended to use it for applications with high availability requirements.

A Node Manager process is not associated with a specific WebLogic domain but with a Machine. You can use the same Node Manager process to control server instances in any WebLogic Server domain, as long as the server instances reside on the same Machine as the Node Manager process.

The Node Manager must run on each computer that hosts WebLogic Server instances (whether Administration Server or Managed Server) that you want to control with Node Manager.
The Node Manager communicates with Administration Servers and Managed Servers using two-way SSL. The default WebLogic Server installation includes demonstration Identity and Trust keystores that allow you to use SSL out of the box. The keystores—DemoIdentity.jks and DemoTrust.jks—are installed in $MW_HOME\wlserver\server\libfolder.

Starting Weblogic Node Manager

Look up for the script named startNodeManager.sh / startNodeManager.cmd within the folder $MW_HOME\wlserver\server\bin

Before starting the Node Manager, you need to have the correct environment available so, at first, execute the script setWLSEnv which is located as well in the bin folder:

C:\Weblogic\wlserver\server\bin>setWLSEnv.cmd

Next, start the Node Manager using the script:

C:\Weblogic\wlserver\server\bin>startNodeManager.cmd

Now verify that the Node Manager is actually running on the port selected in the Machine configuration:

<23-jul-2012 11.34.09> <INFO> <Plain socket listener started on port 5556>
23-jul-2012 11.34.09 weblogic.nodemanager.server.Listener run INFO: Plain socket listener started on port 5556

The startNodeManager script contains all the JVM options needed to customize the Node Manager process, which will be ultimately triggered by the weblogic.NodeManager class.

Common issues when starting the Node Manager

Since the Node Manager uses by default native libraries to optimize its work, some issues can raise if your environment is not configured properly. A very common issue is:

“weblogic.nodemanager.common.ConfigException: Native version is enabled but node manager native library could not be loaded”

You can fix this by making sure that the Library Path is set properly. There are some variables available like “LD_LIBRARY_PATH (UNIX only)” and “SHLIB_PATH” (For HP-UX operating system) to set the correct Library Path:

Example: (For Solaris/Linux)

export LD_LIBRARY_PATH=$WL_HOME/server/lib/solaris:$WL_HOME/server/lib/solaris/ociXXX_X

Alternatively, you can create/update the file $MW_HOME/wlserver/common/nodemanager/nodemanager.properties (where nodemanager.properties is Node Manager’s properties file created at start-up) with the entry:

NativeVersionEnabled=false

Posted on

Adding a new Weblogic Managed Server

oracle weblogic book oracle weblogic books

Within a Weblogic domain, server instances other than the Administration Server are referred to as Managed Servers. Managed Servers host the components and associated resources that constitute your applications—for example, JSPs and EJBs. When a Managed Server starts up, it connects to the domain’s Administration Server to obtain configuration and deployment settings.
Let’s see how to add a Managed Server from the Administration Console:

1.       Navigate to the Environment | Servers option and click on the “New” button.

2.       The New Server window will let you define the basic server properties. For the purpose of this example, we will choose as Server Name “WLSNode1” and enter 7003 as Server Port. Leave the “No, this is a stand-alone server” option selected in the lower part of the GUI (In Chapter 9 we will describe how to create a cluster from a set of managed nodes).

oracle weblogic book oracle weblogic books

Choose Finish. This will take you to the Servers view which now includes the server WLSNode1 as shown by the following picture:

oracle weblogic book oracle weblogic books

Posted on

Adding a new Weblogic Machine

oracle weblogic book oracle weblogic books

Before creating Weblogic Managed Servers, we will need to define a new Machine to host them. A Machine refers to the logical representation of the computer that is hosting one or more instances of Weblogic Servers. In order to create a new Machine, perform the following steps:

  1. In the left pane of the Console, expand Environment and select Machines. The Machines table displays in the main panel showing all the machines defined in the domain.
  2. Click on the Add button. The following screen will be displayed:

oracle weblogic book oracle weblogic books

oracle weblogic book oracle weblogic books

The Machine name is used to identify the machine within the WebLogic Server domain. This name does not have to correspond to the machine’s network name.

In the lower part of this form, you have the option to select the operating system where the machine is running. This has relevance especially if you are using Unix. (In one minute we will show the impact of this choice). Click Next.

As shown by the following screen, you need to select the properties that will be used to configure the Node Manager on this machine.

oracle weblogic book oracle weblogic books

oracle weblogic book oracle weblogic books

By default the communication between the Administration server and the Node Manager is secured using the SSL protocol. If you are having troubles in connecting to the Node Manager the “Debug Enabled” option can provide additional information in the log files of the Node Manager.

Click on Finish to complete the Machine creation. Once created a new Machine, the administration server will be able to use the Machine definition of the computer with Node Manager in order to start the remote servers.

Posted on

How to disable on demand deployment of Weblogic console?

oracle weblogic book oracle weblogic books

As we said, by default the Oracle Weblogic console is deployed on demand (that is, on first request). If you want to have it deployed as part of the boot process, perform the following tasks:

1. Log on to the WebLogic console and click on your domain (e.g. base_domain), in the left navigation bar of the WLS console.

2. Open the Configuration tab and then the General sub-tab; deselect the checkbox labeled “Enable on-demand deployment of internal applications” and Click on the Save button.

oracle weblogic book oracle weblogic books

Posted on

Configuring Weblogic using the Console

oracle weblogic book oracle weblogic books

Through the Administration Console, System administrators can easily perform all WebLogic Server management tasks without having to learn the low level API or the underlying management architecture. The Administration Server persists changes to attributes in the config.xml file for the domain you are managing.

In the following recipes we will learn how to move our first steps with the Administration Console; as we said, the Administration Console is accessible by default at the following address: http://localhost:7001/console.

Now type in the user and password you have entered in the server installation. Once logged in, here is how the Administration Console looks like:

oracle weblogic book oracle weblogic books

As you can see, the Administration Console is composed of several panels; the most interesting ones for us are the following:

1.       The Change Center Panel

To provide secure and predictable means for distributing configuration changes in a domain, Weblogic Server uses a change management process that loosely resembles a database transaction. Therefore, you need to acquire the configuration with a Lock & Edit before performing changes on it and commit changes using the Release Configuration.

oracle weblogic book oracle weblogic books

In development environment, the lock-acquire and release is done automatically for you by Oracle WLS. If you want to modify this behavior, you have to go through the upper Preferences link and disable the flag “Automatically Acquire Lock and Activate Changes

2.     The Domain Structure Panel

This panel is a tree that you can use to navigate into the application server’s resources. Click on any of the nodes in the Domain Structure tree to go to that page. Click the “+” (plus) icon in the Domain Structure to expand a node and the “-“(minus) icon to collapse the node. Once selected an item from the domain, the focus is on the Main panel window:

3.     The Main Panel

This is the core panel where you perform your administration tasks on your resources. Every operation is usually performed through intuitive wizards which are displayed in this panel.