Creating a Data Source using the Weblogic Console is the favorite choice for most developers.
1. From the left panel, expand the “Services” tree option and choose “Data Sources”. The Summary page will display.
2. From there, add a new Data source by choosing New | Generic Data Source.
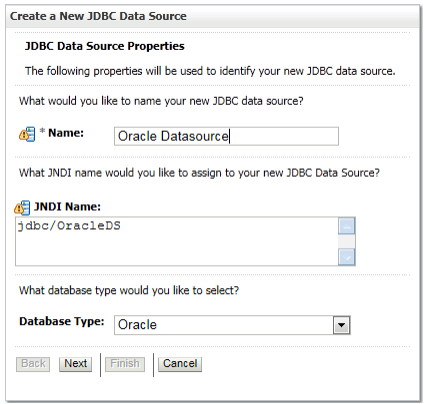
3. In the next window, you will choose some basic properties for your Data Source such as the Name assigned to it, the JNDI name, used to retrieve the Data Source from your applications and the Database Type which we are connecting to:
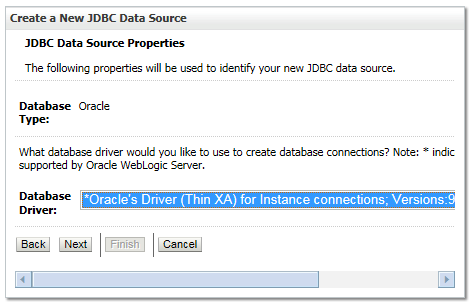
Once done, click Next. In the following screen you will select the JDBC Driver to be used for your database connections. For products like the Oracle SOA Suite, you will often need an XA driver.
|
Oracle WebLogic Server provides strong support for Oracle Real Application Cluster’s(RAC) features contained in Oracle Database 11g, minimizing database access time while allowing transparent access to rich pooling management functions that maximizes both connection performance and availability. Therefore if you are connecting to an Oracle RAC choose the Oracle Thin Driver for RAC. |
|
The WebLogic Type 4 JDBC drivers are installed with Oracle WebLogic Server in the<MW_HOME>/wlserver/server/lib folder. Driver class files are included in the Manifest’s classpath of weblogic.jar thus the drivers are automatically added to your classpath on the server. |
If you selected an XA compatible driver, an intermediate screen will inform you that your data source will support global transactions and use the Two-Phase Commit to honor global transactions. Click Next to Continue.
Finally, in the following screen you will enter the Connection properties which will be used to set up your Data Source’s Connection pool. Provide the host name and the TCP port of the database, along with the database user name and password as shown by the following picture:

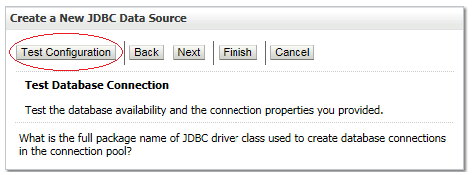
The last screen will recap all the settings inserted so far and let you testing the database connection:
Ok, now your Data Source has been added to the Data Source Summary screen. From there, we can define some specialized settings for our Data Source and target it to Weblogic servers. This is discussed in the next recipe.